A watermark does not stop anyone from copying a photo. What it does is keep your name attached to the image wherever it travels, and make a casual re-post obvious. Whether it manages that depends almost entirely on three settings: where the mark goes, how big it is, and how opaque it is. This guide walks through the Add Watermark to Image tool, and it includes something the sliders do not tell you: the default tiled setting looks fine on a small test photo and falls apart on a large one. We ran the tool on real test images to find out exactly where, so the numbers below are measured, not guessed.
How to add a watermark, step by step
- Add images. Drop one or more files on the upload area or click to browse. You can select many at once, and use Add More later to add others.
- Pick Text or Logo with the two buttons above the settings.
- Set the mark. For text: the watermark text (up to 60 characters), colour, and font size. For a logo: choose an image file and set its size.
- Choose Position, Rotation, Opacity (and Tile spacing when Position is Tiled).
- Check the Main Preview. It shows your first image with the watermark and updates a moment after each change.
- Download each file with the arrow button on its row, or use Download All (.zip).
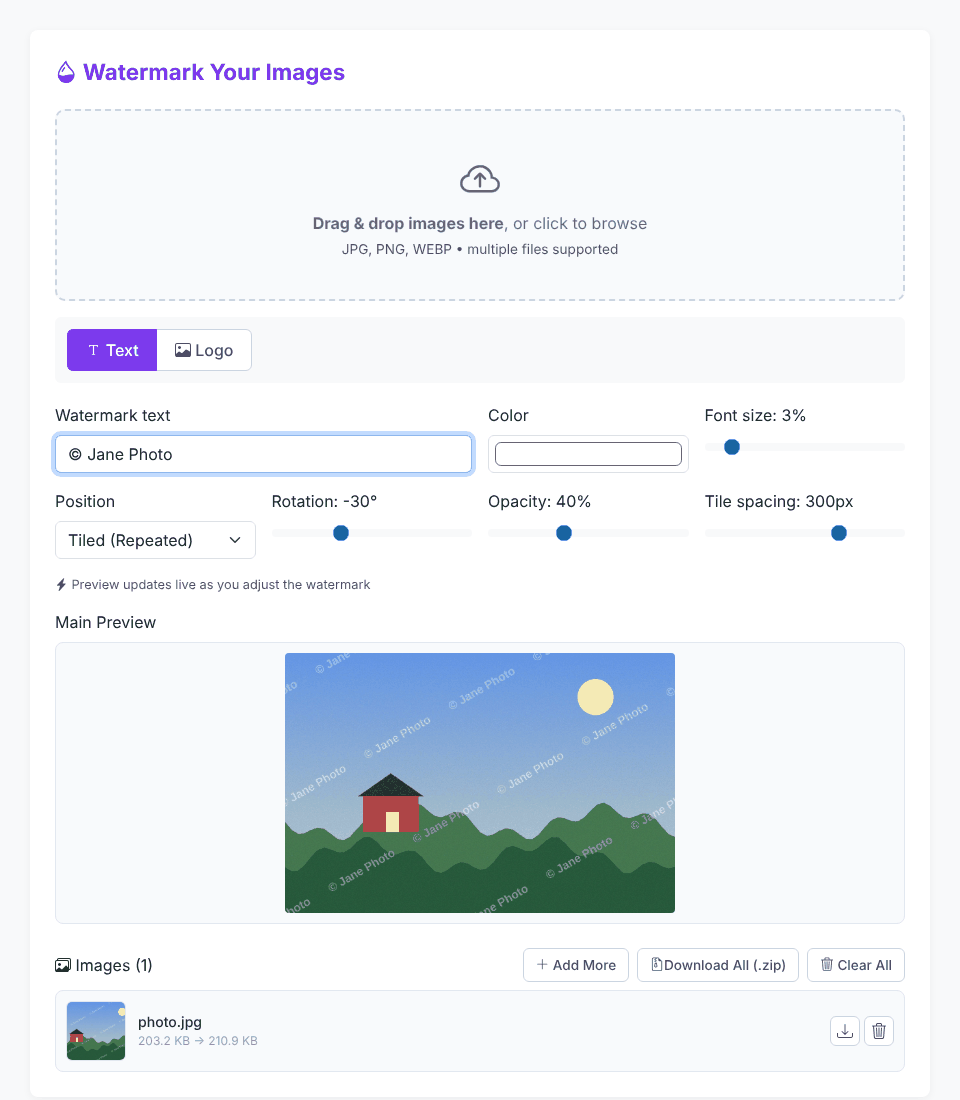
The position list offers Tiled (Repeated), the four corners, the top and bottom centres, and Center. Rotation runs from -90° to 90° and opacity from 5% to 100%. The default text is "© Your Brand", white, 5% font size, tiled, -30°, 35% opacity, 180 px spacing. If you clear the text box the tool quietly falls back to "© Your Brand", so check the preview before exporting.
Corner, centre or tiled: which placement protects best
A small mark in one corner is the easiest to remove, since cropping the corner off deletes it. A single mark in the centre is harder to crop, but it covers your subject, which is why it is mostly used on low-resolution previews. Tiled marks repeat across the whole image, so there is no clean crop that gets rid of them.
- Portfolio and social posts: a corner mark with moderate opacity. It credits you without spoiling the picture.
- Proofs sent to clients before payment: tiled. The client can judge the photo but cannot use it.
- Product photos: a logo in a corner, or tiled at low opacity if copycat listings are a problem.
No watermark is tamper-proof. Someone with editing skill and time can paint over a mark, and a tiled pattern on a flat sky or wall is easier to clean than one over detailed texture. Treat it as a deterrent and as evidence of ownership, not a lock.
Why tiled watermarks turn to mush on large photos
Here is the detail that matters most. The tool measures font size as a percentage of the image width, but tile spacing in absolute pixels (80 to 400). The two scale differently. On a 1200 px photo the defaults work out like this: 5% is a 60 px font, the text "© Your Brand" measures about 383 px wide in the bold sans-serif the tool uses, and the spacing is 180 px. Each copy is already wider than the gap to the next one, so on small images the default marks overlap their neighbours.
On a 4000 px wide photo the same defaults mean a 200 px font, a text roughly 1,280 px wide, and still only a 180 px gap. We exported a 4000 × 2667 photo with default settings and the result was bands of overlapping white text with no readable watermark. About three quarters of the pixels changed noticeably, and the average brightness of the picture rose from 139 to 193 (on a 0 to 255 scale):

The fix is arithmetic. For text, the rendered width is roughly 6.4 times the font size for a 12-character mark (we measured 384 px at a 60 px font and 256 px at a 40 px font for "© Jane Photo"). Choose a font size and a spacing so that width stays comfortably under the spacing value. With the maximum spacing of 400 px, the same 4000 px photo came out clean at font size 1% (a 40 px font, 256 px wide text) and 40% opacity: well-spaced diagonal marks over the whole frame. For long text such as a full website address, lower the font size further or switch to a corner position instead.
Ready to watermark your photos?
Open the Watermark ToolText or logo?
Text is quick, easy to correct and says exactly who owns the picture: a name, a business, a web address. A logo builds recognition across many images but needs a file you already have. In Logo mode, pick the image file and set its size as a percentage of the photo width (5% to 60%, default 20%). A PNG with a transparent background looks best because the logo's own edges are used; a logo with a solid background is drawn as a block, as the blue rectangle in this example shows.
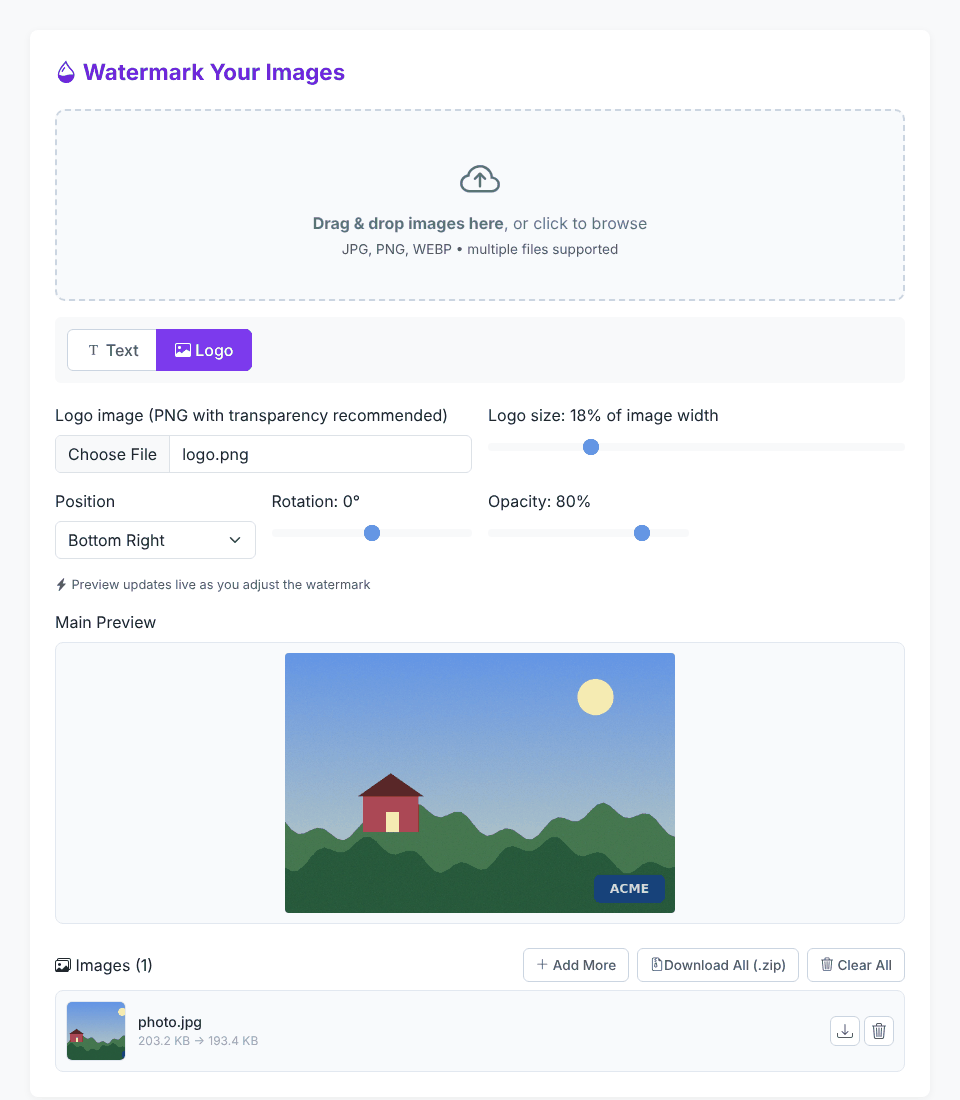
Two things to know about Logo mode. If you switch to Logo but do not choose a file, nothing is drawn; the preview and the exported image are simply unmarked, with no warning. And in a tiled logo layout, the logo is repeated with the same spacing rule as text, so check that the logo width at your chosen percentage is below the spacing value.
Watermarking a whole batch
Settings apply to every image in the list, identically, with sizes scaled to each image's width. The preview shows only the first image, so before processing a mixed batch, add one portrait, one landscape and your largest file and look at each row's thumbnail. Remember the large-photo problem above: a setting that looks right on a small image may overlap on a bigger one, because the spacing does not scale.
Each row shows the original size and the new size, for example 160.8 KB → 208.8 KB. Exports are always JPEG at 92% quality (set in the tool's code, with no slider), so files can grow when the original was compressed harder, and shrink when it was a lossless PNG. In our tests a 1.32 MB, 4000 px JPEG became 2.50 MB with the default marks and 1.38 MB with the clean settings above, while a 161 KB, 1200 px JPEG became 209 KB with the defaults and 145 KB with a light 1% mark. For web delivery, run the batch through the Image Compressor or the Image Resizer afterwards.
Two limits we found when testing batches:
- Download All (.zip) can be missing right after you add files. The button only appears once the thumbnails have been rendered a second time. Change any setting, for example nudge the opacity, and it shows up. The per-row download buttons work immediately.
- Files with the same base name overwrite each other in the zip.
photo.jpgandphoto.pngboth becomephoto-watermarked.jpg, and the zip then contains only one of them. Rename duplicates before you upload them.
What the exported file keeps and loses
Every export is redrawn on a canvas and saved as a new JPEG named <original name>-watermarked.jpg. We checked what that does to a test photo that carried camera data, GPS coordinates and a 300 DPI setting:
- Metadata is gone. The test original carried an EXIF block with camera, lens, date, copyright and GPS fields. The exported file had no EXIF block at all. That is a useful side effect when sharing, but note that your copyright field is also removed, so the visible mark is the only ownership signal left. (Use our EXIF Data Remover if you want to strip metadata without watermarking.)
- Pixel dimensions are unchanged (1200 × 800 in, 1200 × 800 out), and the resolution tag is dropped: our input said 300 DPI, and the exported JPEG carried no DPI value. Use the DPI Converter afterwards if a print service asks for one.
- Rotation is baked in. A file stored as 800 × 1200 pixels with an EXIF orientation flag (value 6, "rotate 90° clockwise") came out as a 1200 × 800 image drawn the right way up, with no flag left, so it will not turn sideways in other apps.
- Transparency becomes white. Output is JPEG, which has no transparency, so a PNG with transparent areas gets a white background first. In our test the left half of a PNG was transparent; in the export that half was plain white (average pixel value 255 in every channel), so a white watermark placed on that area is invisible.
Are your photos uploaded?
No image data is sent anywhere. We read the script: the watermark is drawn with the browser's canvas, and the only network call in the tool's code is the feedback form. We also watched the page's requests while loading two photos, changing every setting and downloading a zip. There were no POST requests; the only requests were page assets such as Bootstrap and JSZip, which load from a CDN, plus the site's own scripts. The page also shows ads, which load their own scripts, so as with any web page you should not treat it as an isolated offline tool, but your photos are not part of any request.
Quick answers
What file types can I add? Any image your browser can open is accepted by the file picker; the tool's own labels name JPG, PNG and WEBP, which are the ones we tested. Non-image files are rejected with the message "Please select valid image files (JPG, PNG, or WEBP)."
What colour should the text be? The default white shows on dark and mid-tone areas but disappears on snow, sky or white backgrounds. Pick a colour with the colour box that contrasts with your photo, or use a mid-grey as a compromise.
Can I save my settings? There is no preset feature, so you set the options again each visit.
Can I remove a watermark afterwards? No. The mark is drawn into the pixels of the exported JPEG, so keep your originals.
Does a watermark give me legal protection? A visible mark helps show who made an image, but copyright law and registration rules vary by country. This is not legal advice.
Ready to watermark your photos?
Open the Watermark Tool